Here is the "recipe" for nursing the joint back to normality:
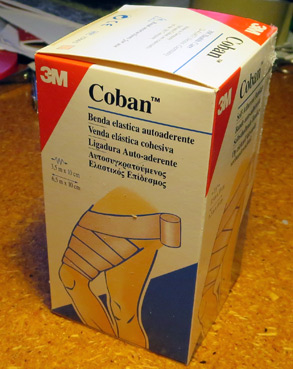
You will need elastic bandage called Coban, (and only that slightly elastic type will do), it often needs to be ordered from a pharmacy. (Or maybe on the web?)
You will need a roll of 10 cm wide and one that is 5 cm wide.
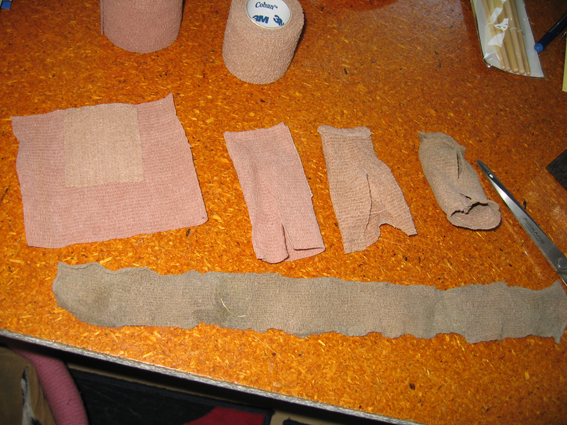
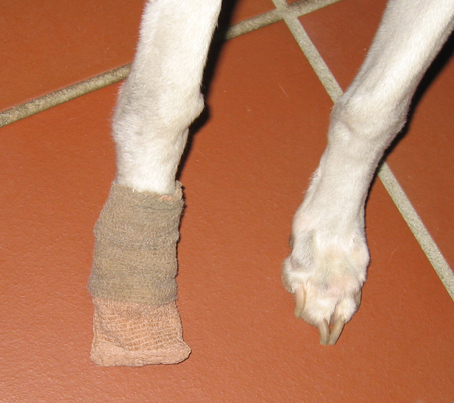
You cut an oblong square from the 10 cm wide Coban. You can see the piece to the left in the above photo. It must be wide enough to reach around the dog's foot with a slight overlap - so adjust it yourself if for a bigger dog!
Then you cut an oblong square from the 5cm Coban and place it in the middle as shown here and press it down well on the first piece (press / rub with the side of the scissors or your nails crosswise) in the position shown in the photo.
Also press on the other side - this is the part the dog walks on and wears the most - hence this reinforcement.
Next, you bend it together like the next "figure" in the photo, with a bit of overlap. Now you have to bend it up over the toes about 5 mm (3rd bandage from left in the picture) and with a finger inside so you do not accidently close the "tube" inside, you squeeze lots of times with your nails so that it sticks and closes firmly together at the end outside.
Now you have a kind of "sock" that lasts a week or more.
It can be hand washed and re-used until it is completely worn out! It depends on how much the dog runs in the garden and there CAN start holes that do not necessarily matter, as long as his toes cannot spread out, but are kept in place.
This is the secret you see: The bandage prevents the toes from "opening up / spreading" during braking, twisting and turning, etc., but the foot otherwise operates fairly normally.
With the bandage on, the the weak toe simply CANNOT get out of joint again.
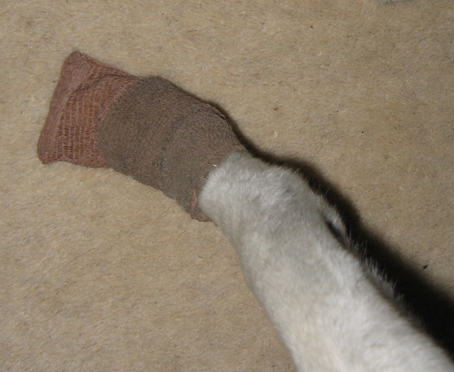
Then you put on the sock on the foot. Best if you stand with the dog between your legs and bend well over the dog, lift the leg and hold the paw up, and pull the sock on. Then squeeze the overlap slightly closed around his leg, hold with your thumb in front and then tie the approximately 35 cm long piece of the 5 cm wide Coban around and around and around starting under his big foot pad. (NOT around the actual toes, they are fine with just the sock holding them.)
You start under the foot because by stomping around on top of this starting end bit, it helps to keep the whole bandage stay stuck together so that it does not fall off or unwind. One quickly learns the art!
This is what it looks like with the 5 cm bandage wrapped around. Be careful not to make it too tight. So when you have wrapped the 5 cm width around a few times and a little up the leg, you stick a finger down in the top of the bandage between the bandage and the dog's skin and FORCE the end down into the "gap", and then squeeze the hole closed again and then it remains closed - when you are a little experienced!
OR you can cut it up a bit in the middle and tie a small knot. NB. In the photo I have taken a freshly made "sock" on Timmi, with a piece of older 5cm elastic wound around, (it cannot be avoided that it gets dirty - but it lasts in all kinds of weather!) - because this way you can distinguish the one bandage from the other of the two parts which he wears. The 5 cm bandage is there ONLY to hold the sock on - and must be tied in a normal “woven” bandage pattern to hold.
Timmi wore this for a little over a year and a half, every time he could run free - in the start, only in our garden - so he actually came to me to get it on, quite automatically! It became such a habit! The toe joint became slightly enlarged at first but apparently gave NO pain - just so long as he had the bandage on WHEN HE RAN.
If it was just an on-leash walk, then he did not need to wear it, nor walking around indoors at home – it was only when he might run.
It worked - and I wish more people could know about this and use it - it would save many a toe amputation. A
dog needs ALL it’s toes when running.
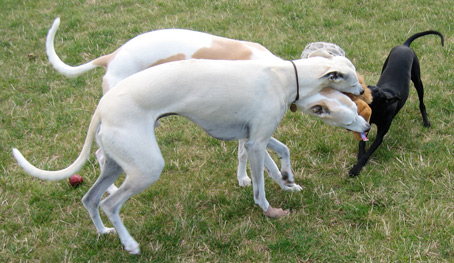
Timmi got COMPLETELY recovered. You can actually see him running with it on in the garden on my YouTube video. Here is one: www.youtube.com/watch?v=rKCeJagy7yY– it’s on his right front foot and he can play normally because the bandage holds his toe from popping out.
See his first time without a bandage and declared healthy and running Lure coursing training: www.youtube.com/watch?v=OLcVrh_ve8Q
He runs as the 3rd dog, but unfortunately with two "false starts" before he can run. (He only runs the half of the course “just in case” and he was SO happy.) Firstly, another dog breaks free and runs in front and interferes. The second time the cord snaps - ugh! Each time needing a re-start. I love watching this video - a lovely summer day with birds singing! This bandage saved Timmi's quality of life - and it IS animal cruelty for a Whippet to never be able to run - and they DO need ALL their toes.
Good luck to any readers with this problem!

|